Databricks Spark Prototyping
When I first started learning Scala Spark a couple of weeks back I was overwhelmed with the number of “prerequisites” required to package your code into a working JAR file that could be passed to a cluster.
I installed Metals, SBT, ran the Spark shell locally, set up Docker containers. While all of this proved to be useful later down the line, all I really wanted to do was to iterate over smaller chunks of functionality to make sure I was heading in the right direction before packaging the code and spinning up a cluster in the cloud.
Coming from a data analyst and Python background, I found myself missing the access to easy prototyping features that jupyter notebooks can offer.
That’s when I stumbled upon Databricks. And not surprisingly, the founders of Databricks are the original creators of Apache Spark!
Databricks offers several ways and language APIs to interact with a Spark cluster. In this tutorial we will start out with the notebook functionality to write Scala Spark, which we will then package using VSCode and SBT. Finally we will submit the JAR file to the cluster to confirm that our code is working properly.
Databricks offers a 14-day free trial for new users. I signed up with my AWS account got access to an auto terminating m5d.large, 1 driver, 8 GB Memory, 2 Cores cluster. This will be more than enough for prototyping as a beginner and will get us up to speed on how to write Scala Spark.
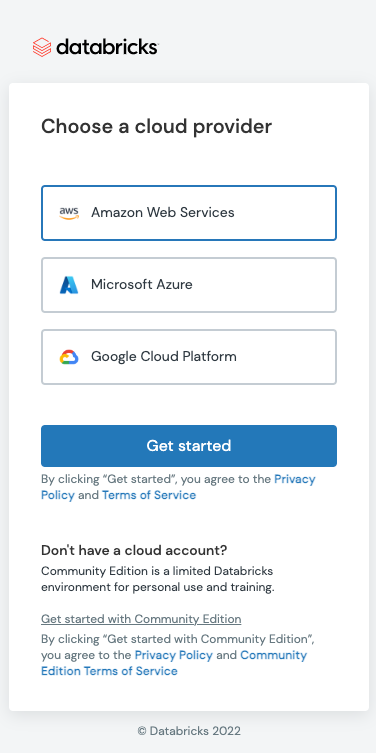
Head over to Databricks and click Get Started for Free.

Enter your personal details, authenticate your email address and choose your cloud provider of choice. We will use AWS in this tutorial.
Set up your workspace and create a cluster (make sure to choose the hardware options that are free under the 14 day free trial)!
In your workspace, navigate to your user and under the dropdown click Create Notebook and select Scala as your default language:

Great! We’re all set up to start working on some Spark code. But before we dive deeper into that, we need some data. There are a ton of great and free datasets available online through platforms like Kaggle, World Bank Open Data, Data.gov just to name a few. In a previous tutorial, I used the Synthea, a synthetic patient and population health data set. Check out the first sections of that article to learn how to load those files into S3.
Loading data into Databricks Notebooks using AWS credentials:
The first thing we need to do is to authenticate Databricks to access our CSV files that are stored in our AWS S3 account. As always, there are several ways to do this, but for the sake of speed and convenience, we will just add our credentials as val objects in our Notebook. Paste the below code in the first cell of your notebook, change the values and press ctrl+enter to run the cell.
// Change the values with your AWS credentials, found in the IAM portal on your AWS Console.val AccessKey = “<Your-AWS-Access-Key”
// Encode the Secret Key as it can contain the “/” character.
val SecretKey = “<Your-AWS-Secret-Key>”.replace(“/”, “%2F”)
val Region = “<Your-AWS-region>”
If security is a concern, you can also pass your credentials as environment variables using the Secrets API in the Databricks CLI.
In the next cell, we load our S3 hosted CSV file into a dataframe:
val df = spark.read.option("header", "true").csv("s3://<your-S3-Bucket-URI.csv>")Databricks also offers an excellent data visulization suite which is accessible by wrapping your query using display(). Create a new cell and copy the below code:
val df = display(spark.read.option("header", "true").csv("s3://<your-S3-Bucket-URI.csv>)
The visualization options make for a useful data exploration tool (notwithstanding the gibberish viz below)!

SQL Transformations:
Run this Spark SQL code in a new cell to perform some data cleansing to your raw data.
df.createOrReplaceTempView("encounters_SQL")
    val transformed_df = spark.sql(
      """
        SELECT DISTINCT
            id,
            patient,
            code,
            description,
            year(date) as year,
            month(date) as month,
            day(date) as day,
            date
        FROM encounters_SQL
        WHERE date <> 'date';
      """)
Run transformed_df.show() to confirm that the data looks correct. If so, great! We’ll finish this simple example off with exporting the processed dataframe back to S3 in Parquet by running the final command of the Spark query:
transformed_df
        .write
        .mode("overwrite")
        .parquet("s3://<Your-Output-S3-Bucket-Location")
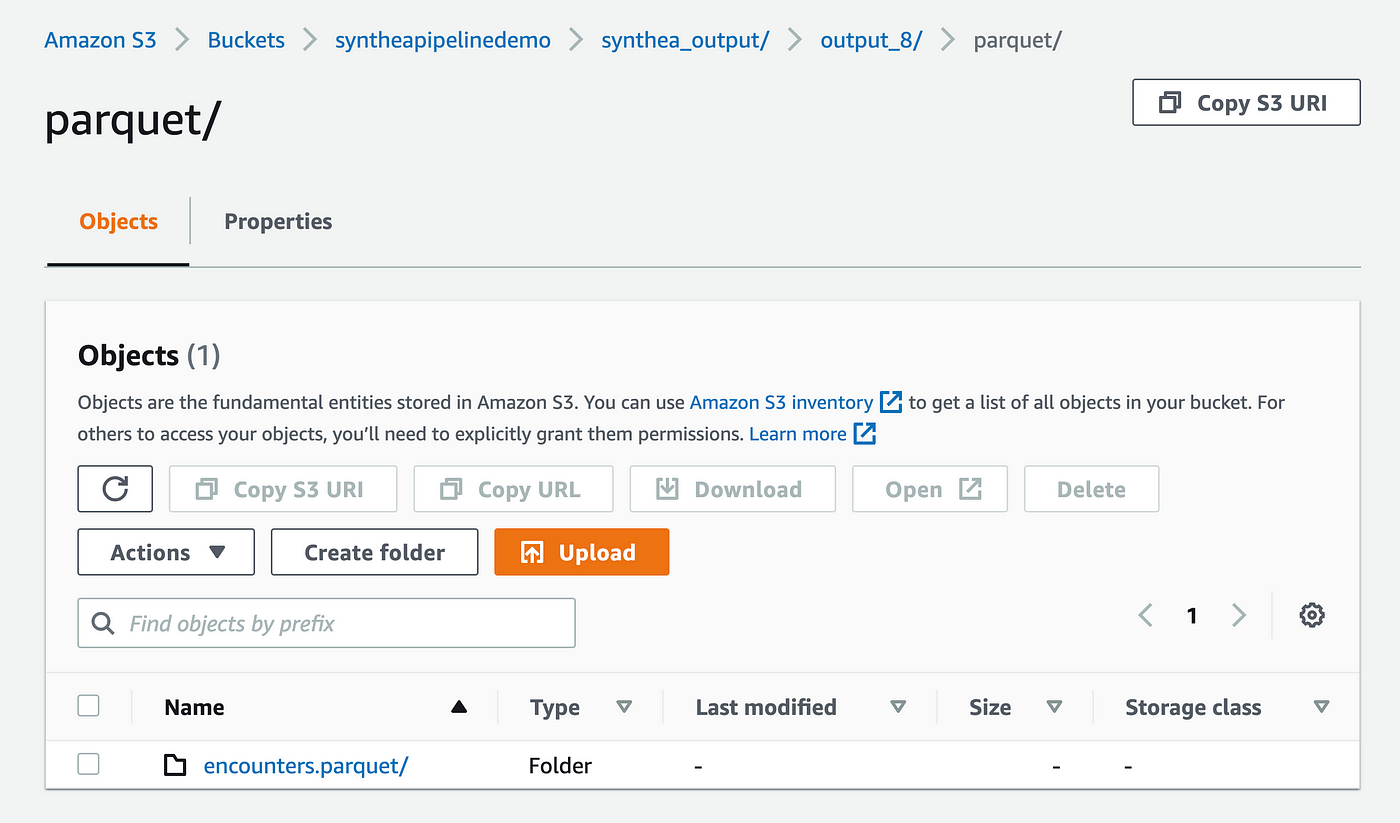
Great! After confirming that the Parquet file is indeed loaded correctly in S3 it’s time to package our code into a Jar file that be stored and run as a job in Databricks and in other Spark environments.
To do this you will need to head back to your IDE. In this example we are using VSCode and SBT.
Run the following in your VSCode terminal
brew install sbtOpen a new workspace and create the following folders and files:
.
├── build.sbt
└── src
 └── main
      └── scala
            └── transform.scala
Then paste the first boilerplate code into transform.scala:
package org.eightoheightengineering.transformimport org.apache.spark.SparkContext
import org.apache.spark.sql.{DataFrame, SparkSession}object encounters {
  def main(args: Array[String]): Unit = {val (spark: SparkSession, sc: SparkContext) = createSessionperformELT(spark, sc)
  }def createSession = {
    val spark: SparkSession = SparkSession.builder
      .appName("SyntheaEncountersTransform")
      .master("yarn")
      .config("hive.exec.dynamic.partition",
        "true")
      .config("hive.exec.dynamic.partition.mode",
        "nonstrict")
      .config("hive.exec.max.dynamic.partitions",
        "10000")
      .config("hive.exec.max.dynamic.partitions.pernode",
        "10000")
      .enableHiveSupport()
      .getOrCreate()val sc: SparkContext = spark.sparkContext
    sc.setLogLevel("INFO")

    (spark, sc)
  }def performELT(spark: SparkSession, sc: SparkContext) = {

    // Paste your Databricks notebook cells here}
}
And this code into build.sbt. Please note that the Spark Version is important for your specified Spark environment. My Databricks cluster runs on Spark 3.3.0 and Scala 2.12.0:
name := "transform"
version := "1.0"
organization := "org.eightoheightengineering.transform"
libraryDependencies += "org.scala-lang" % "scala-library" % "2.12.0"
val sparkVersion = "3.3.0"
libraryDependencies ++= Seq(
  "org.apache.spark" %% "spark-core" % sparkVersion,
  "org.apache.spark" %% "spark-sql" % sparkVersion,
  "org.apache.spark" %% "spark-hive" % sparkVersion
)
Finally, paste your Databricks cells into the boilerplate transform.scala script and save your files. Then run sbt package in the root directory of your project in VSCode. If all goes accordingly, you should see a new .jar file in target/scala-2.12:

Great! Now let’s test our Jar file as a Job. Head back to Databricks and navigate to Create / Job:

Change the type of job to Jar and specify your main class. In this tutorial it is org.eightoheightengineering.transform.encounters:

Press create and run the job. Fingers crossed!
Check back after a little while (my workload took 1m 14s) and check your S3 bucket to confirm that the Parquet files are present.

That’s it! Now you have a boilerplate template to be able to submit Scala Spark jars. Start exploring your own datasets and play around with other ways to transform data in Scala, such as Datasets.